Description of Issue
Rotary Jig will not calibrate properly. The jig overshoots or undershoots the starting mark, doesn’t rotate at all, or continuously rotates without stopping. Without a successful calibration, rotary carves are likely to fail.
Possible Causes
Improper placement of the jig is the most common cause of this issue. Improper mounting of the carving material can keep the the jig from rotating freely. Head pressure that is too low can effect the jig’s ability to track properly, as does improper installation of heavy duty traction belts. On some occasions, a defect in the jig or tracking system of the machine can be the cause.
Troubleshooting Steps
- Before placing the jig in the machine, check that the jig rotates freely without any snags or catching. If the mounting screws are not seated all the way, the screw-heads can interfere with the rotation. You can feel this interference by rotating the piece by hand. Simply tighten the screws in to the fully recessed position. NOTE: Always tighten screws by hand. Powered screwdrivers in this situation generally make this problem worse.
- Check the placement of the jig. The side plates of the jig should be sitting on top of the squaring plate and sliding plate. (fig. 1) The tabs on either side should be sitting snugly in the recesses on each of these plates.
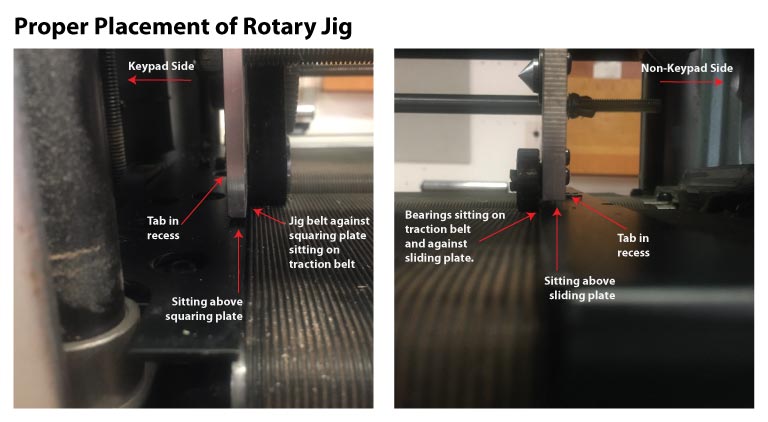
fig. 1 - Check to see if the idler pulley is in the correct place. (fig.2) If this is not directly over the brass tracking sensor wheel, contact support for a replacement jig. This is a rare issue of an improperly assembled jig. Take photographs to send to support for verification.
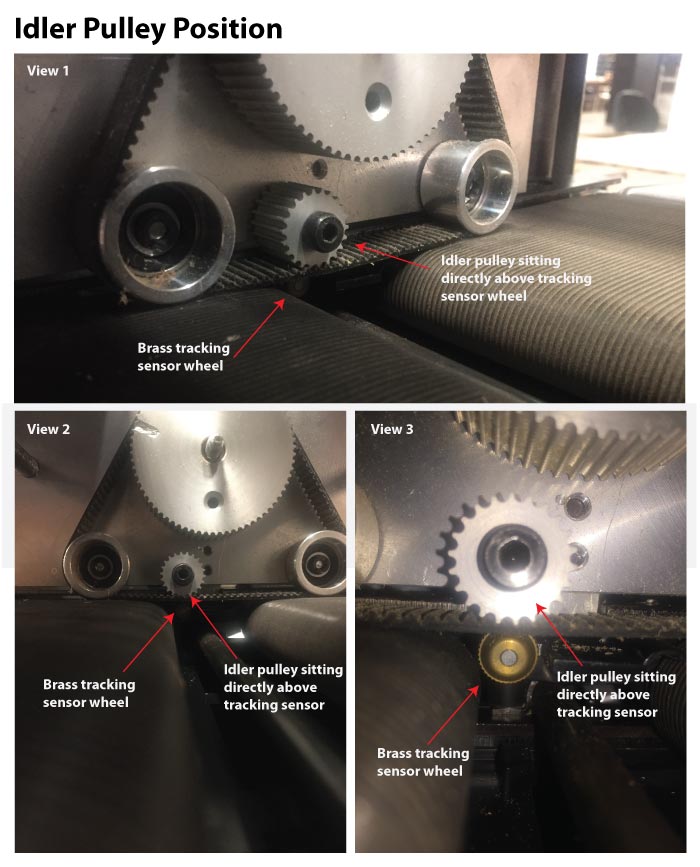
fig. 2 - Check that the head pressure is between 75 to 90 lbs. The rotary jig requires more head pressure than regular carving operations. It is not uncommon to press down on the head while cranking down to give the head an extra boost of pressure. (See Rotary Jig Set Up Tutorial video) Check your head pressure first, and gauge if you think you might need an extra boost. Please see the “Checking the Head Pressure” document on the CarveWright website for continued troubleshooting of this issue.
- If none of these steps resolve the issue, the next step is to troubleshoot the belt installation and the tracking sensor. HD Belt installation involves adding spacer washers under the squaring plate and tracking sensor assembly. If any of these spacers are missing, you will get tracking errors. The damper spring, under the tracking sensor, will often get knocked over when replacing belts or the tracking sensor. This should be double checked, as well. See the below resources for further troubleshooting of these issues.