Adapted from a Tips & Tricks by by Michael Tyler of CarveBuddy.com
This Tips features a few pointers on how to set up two-sided carving projects. We’ll cover Alignment Methods and Pattern Depth Settings for two-sided projects. These are the most common methods I use myself and they may not necessarily be the only methods. However, they have been helpful for me and I hope they will help you too!
Front-to-Back Alignment: CENTERING METHOD
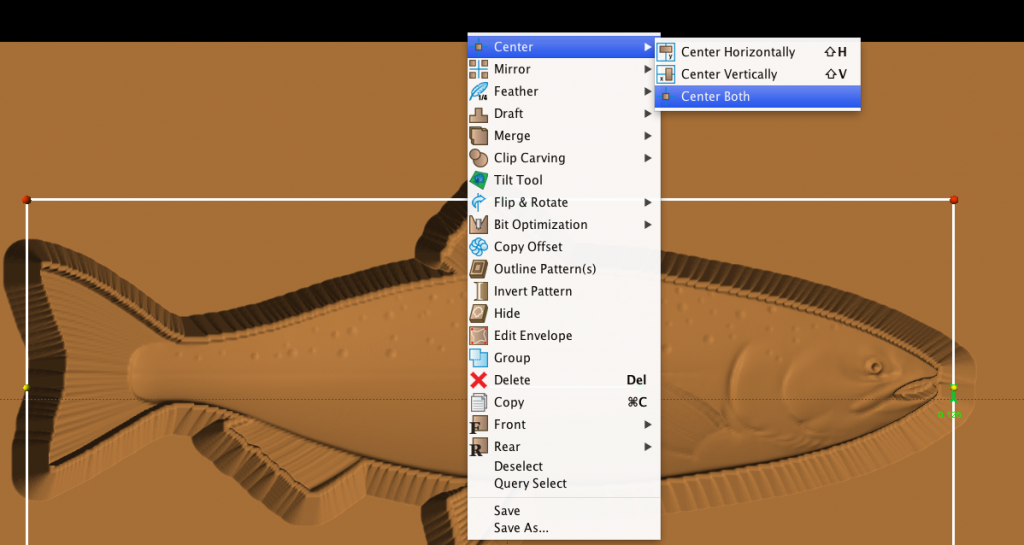
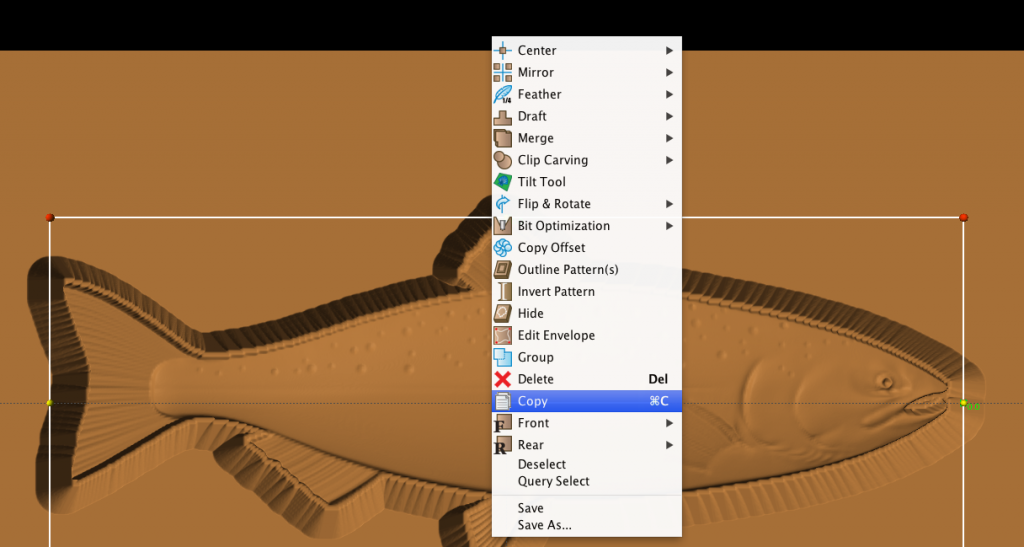
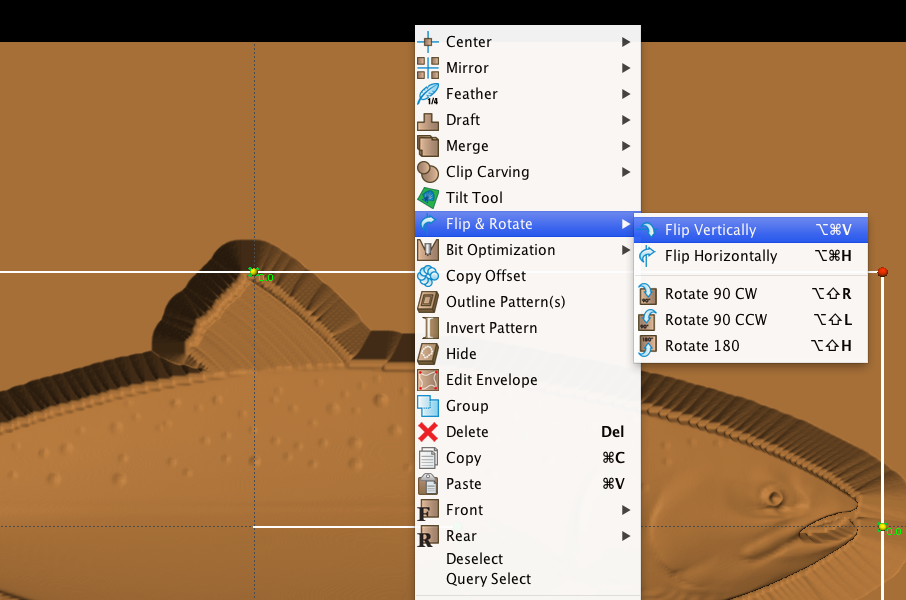
Perhaps the easiest way to align two identical items with each other to the front and back of the board is by using the Center Tool.
Place the item on the front of the board first, then right-click your mouse and select Center/Center Both from the popup menu. Then, copy the item and paste the copy onto the back of the board. Remember when working on the back of the board, you are viewing it upside-down. This means you will need to flip the item vertically so that it is in the same orientation as the item on the front of the board (right-click the item, then select Flip/Flip Vertically from the pop-up menu).
The two items will now be aligned with each other front-to-back. (fig. 1a, 1b, 1c)
Front-to-Back Alignment: SNAP and GRID METHOD
You can use the Snap feature (in the Layout Menu) for help with alignment of single or multiple objects in your layouts. If you are not already familiar with the Snap and Grid tools, they are documented in your Designer Software Owner’s Manual.
Turning on the Snap/Grid function allows you to drag an object and it will “snap” to the nearest grid line. Position your object on the front first, copy it, then paste the object on the back of the board. Flip the object vertically so it is in the same orientation as the front object. (Remember that you are working upside down when viewing the back of the board.) You will need to drag the object to the appropriate location and allow it to snap to the grid an equal amount of space from the edges of your board to match the front
object’s placement. Revolving the board front-to-back as you work can help you keep things straight in your mind as you do this. (fig. 2a, 2b)
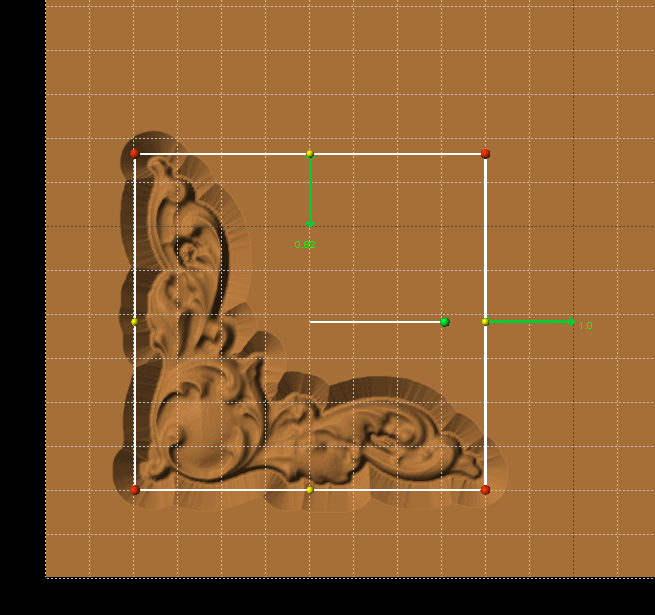
Front-to-Back Alignment: ATTACHMENT METHOD
You can use the Attachment features for very precise alignment of single or multiple objects in your layouts.
If you are not already familiar with the Attachment functions, they are documented in your Designer Software Owner’s Manual. As of this writing, instructions on how to use attachments are found on pages 67, 68, and 75 in the manual. (fig. 3a, 3b)
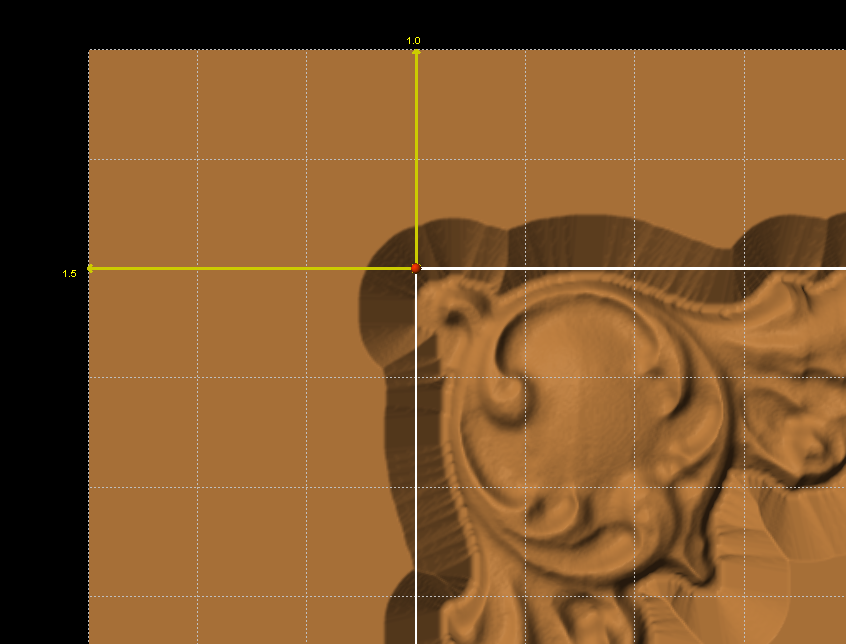
would be from the bottom edge of the board as viewed in Designer) Attached at 1.5” from left edge (will be the same for the back of board)
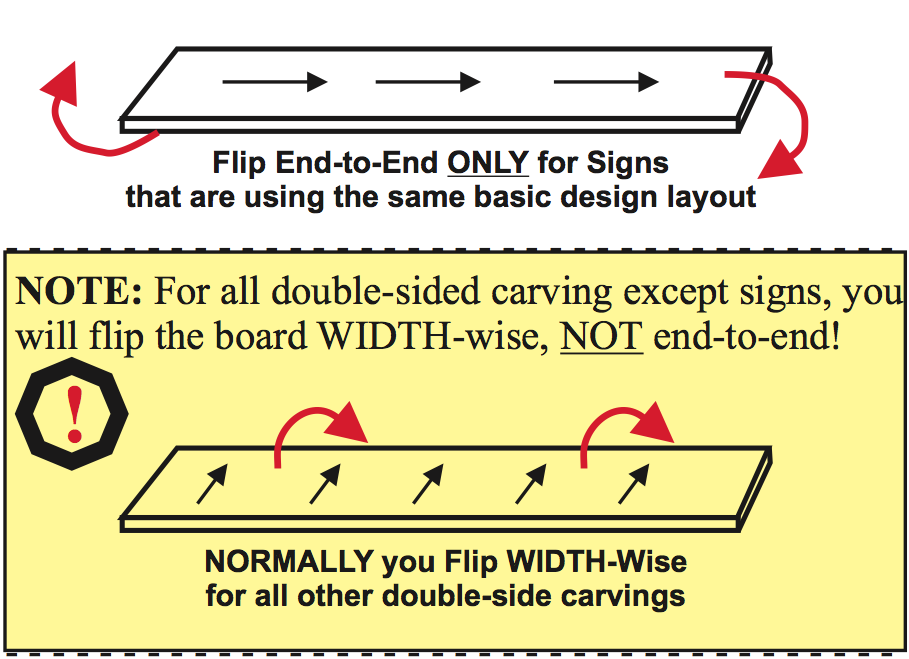
Front-to-Back Alignment: For DOUBLE-SIDED SIGNS
The easiest method for carving double sided signs is to simply create one main layout on your board with the overall design centered on the board.
Instead of fussing with copying/pasting all the design elements and text of your sign onto the back, all you need to do is carve one side, then flip the board over length-wise, END to END in this case, and carve the sign again on the other side! Simple and easy.
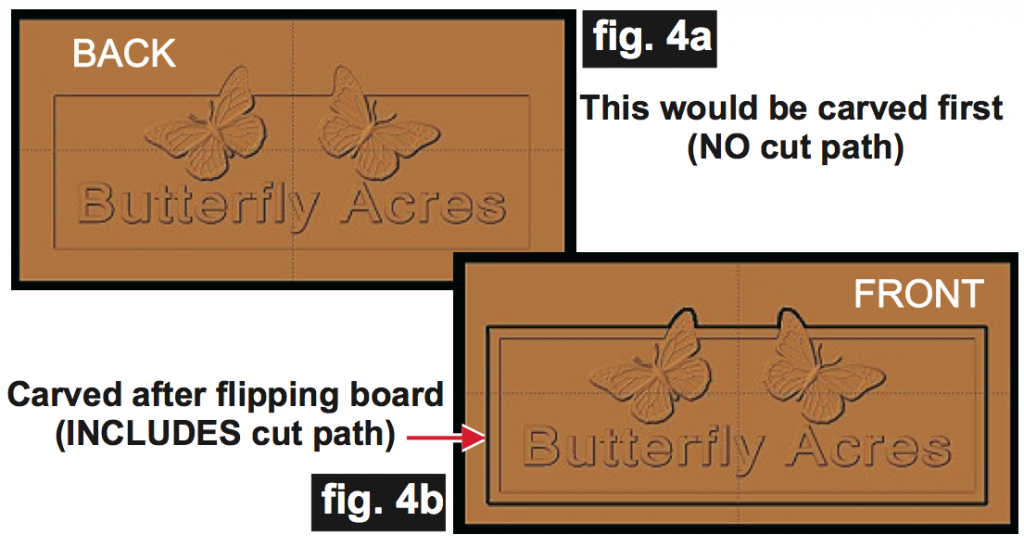
If your sign will need to be cut out using the Cut Path tool, then the first side (the back) will be carved WITHOUT the cut path. The second side (the front)
will be carved (and cut out) WITH the cut path. Essentially, you could create two versions of the sign – identical, except that one layout has the cut path, the other doesn’t.
Here’s an example of a sign with an identical design for both sides except for the cut path. The back would be carved first, the board flipped (length-wise) then carved and cut out using the layout version that has the cut path on the front. (fig. 4a, 4b)
Setting Depths for Pattern Cut Outs
The Depth setting for patterns that will be cut out will vary, depending upon the pattern and the thickness of your board. If possible, plan to leave about 1/8″ in the middle of the board and set your depth accordingly (this is to leave enough material for safety hold-in tabs when using the standard Cut Path feature with the auto-tabs creation).
EXAMPLE: If your board is 3/4″ thick, then each pattern can be set at 0.312″ carving depth to leave about 1/8″ of material “sandwiched” between them in the middle of your board. The auto safety hold-in tabs will be created on this middle thickness. (fig. 5a)
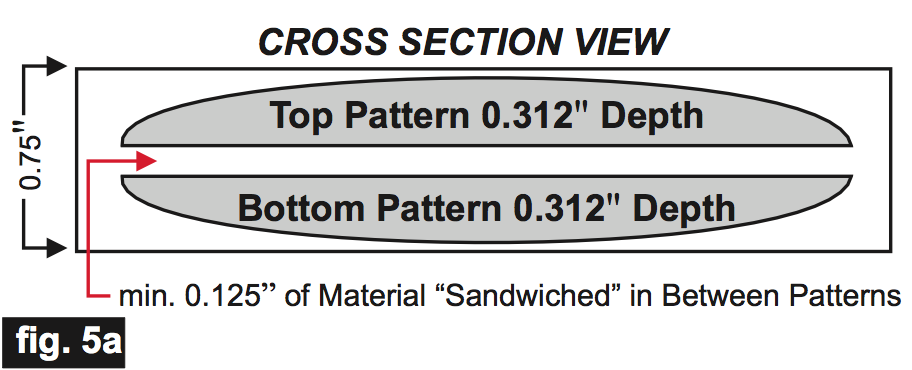
After setting the depths, return to the Front of the board, select the pattern, then click on the Outline Tool. While the outline is still selected, click on the Cut Path Tool and set your automatic placement tab options as desired. Your two-sided carve is ready to run through the machine.
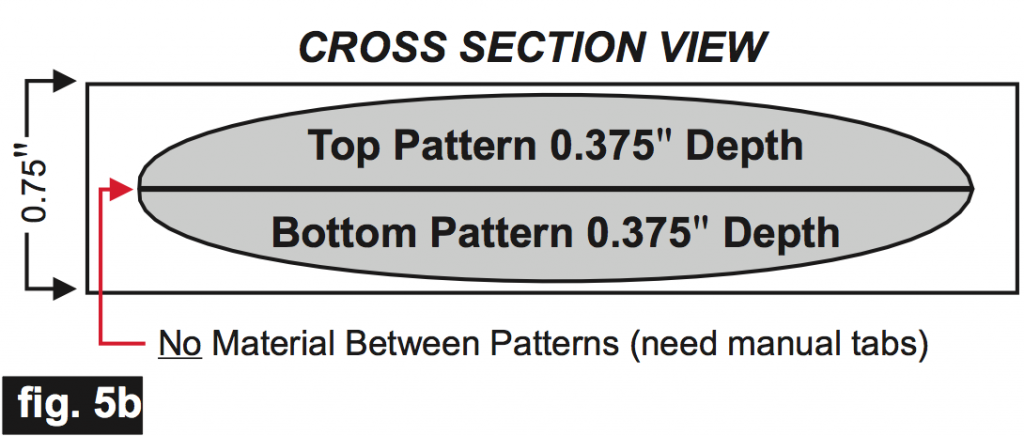
Sometimes, you don’t want the middle thickness; i.e., you need each pattern to carve into the board at the complete half thickness of the board.
EXAMPLE: For a 3/4″ thick board, set each pattern’s carving depth at 0.375″. This leaves NO middle “sandwich” and you will not be able to use the standard Cut Path feature. You’ll need to manually create tabs yourself using the Make Tab tool. (fig. 5b)
To learn more about doing 2 sided carvings, see Tutorial 5.3 – Invert, Appliques and Two Sided Carvings.