This is a frequent issue that we get asked about a lot. A good quality graphic is critical to making a successful carve-ready pattern, but what makes it good and how can you improve it if it is not good?
We’ll use this real life example to illustrate this topic.
Let’s pretend you’ve been hired to make a sign. They want their emblem or logo carved into this sign and so you will need an image to import.
You should ask them for:
- A high resolution image or graphic. (hi-res, hires) Resolution is a term describing the number of pixels that make up the image. A quick rule of thumb is to require images to be as close to 1000px (pixels) or more as you can get.
- A JPG or PNG file of the image. Both will work, but understand the differences. PNG files are ideal for logos and other graphic images. They can have a transparent background and don’t have any of the compression noise you can find in jpgs making it an instant import and you’re done. JPGs can still be great images too. As long as it’s a high enough resolution and doesn’t have any of that notorious jpg noise around the edges.
So, you’ve asked for the image and they give you this:
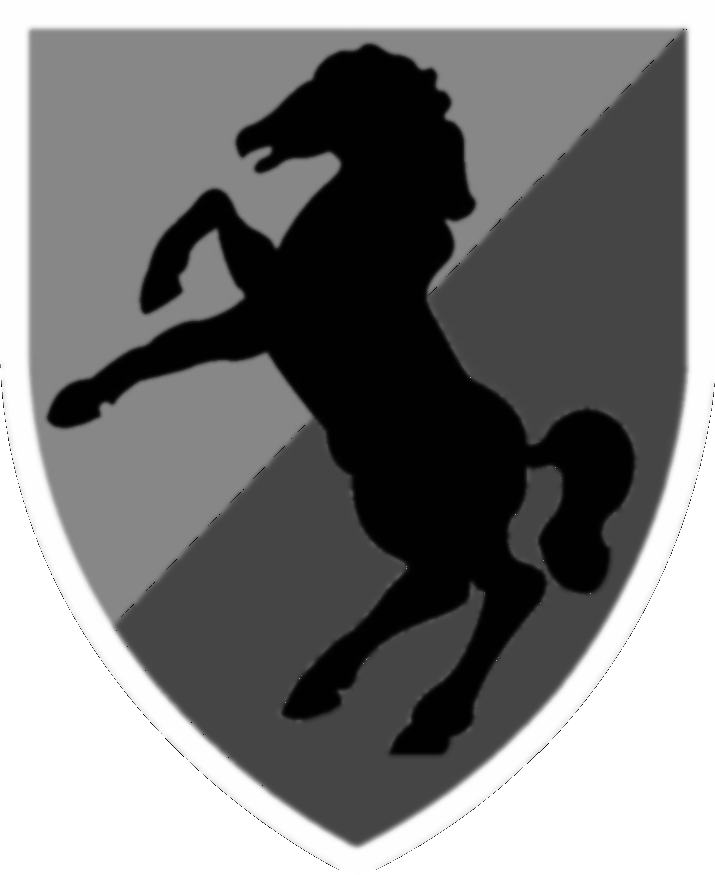
Obviously, they don’t quite understand what you need. It’s a very poor image with ill defined edges, jpg compression noise all around the horse, a strange dotted line, and so much more. This will never carve well.
No worries, we can fix this.
I have a list I run down in these situations.
- First, is there any way to get a higher resolution image to work from. You can always contact the client back to ask if they have something better. If it’s a well known organization, a quick google image search will often find a much better version of the graphic.
- Vectorize it. Can I do a vector trace or redraw it myself with vector drawing tools. There are free options for these types of tools. https://www.autotracer.org/ https://inkscape.org/
- Can I clean it up enough with the filters in Pattern Editor or Pattern Sculptor? Smooth, De-noise, and Quantisze filters are designed to quickly help get images ready for carving.
- As a very last resort, maybe a pixel by pixel editing process will be needed. This method is used mostly never.
The google image search is most likely the only step you’ll need. With hi-speed internet being so prevalent these days, finding hi-res images is getting much easier. Google even has a tool that will use that bad graphic and find similar images.
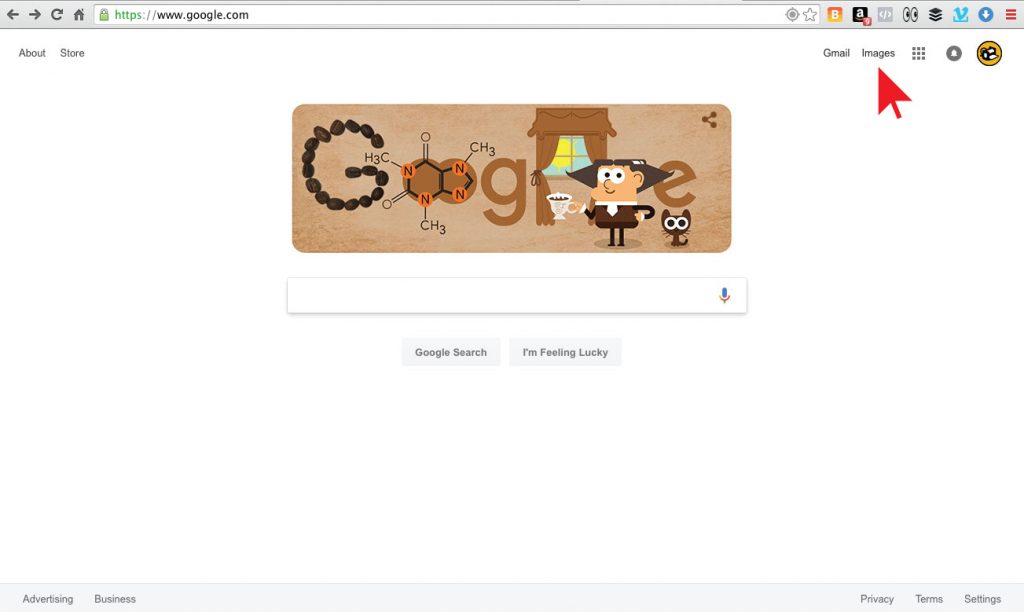
1. Go to Google.com and click on “Images”

2. Click on the Camera icon to “Search by Image”
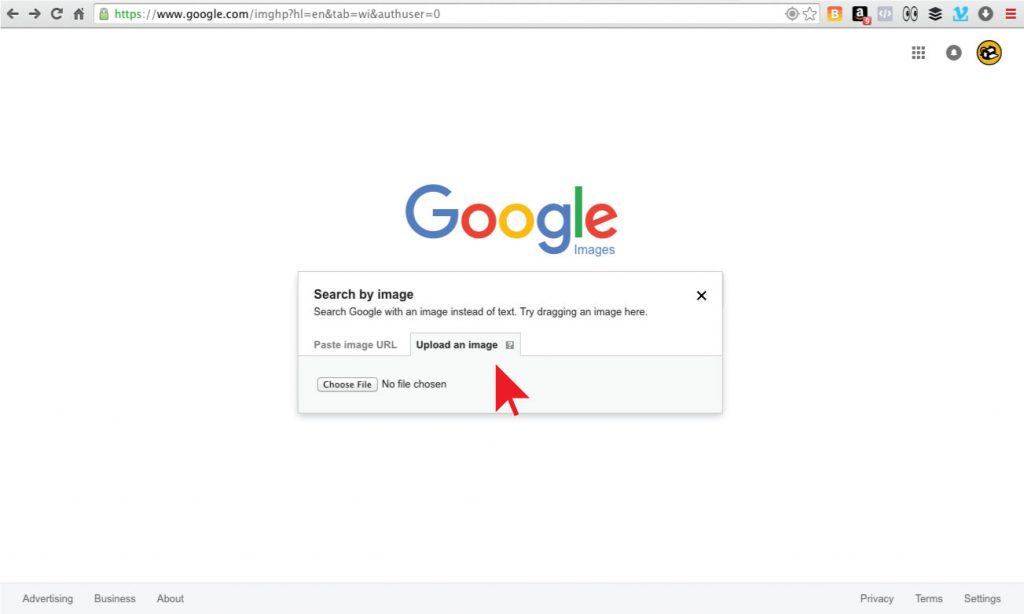
3. Upload the image you want to search.
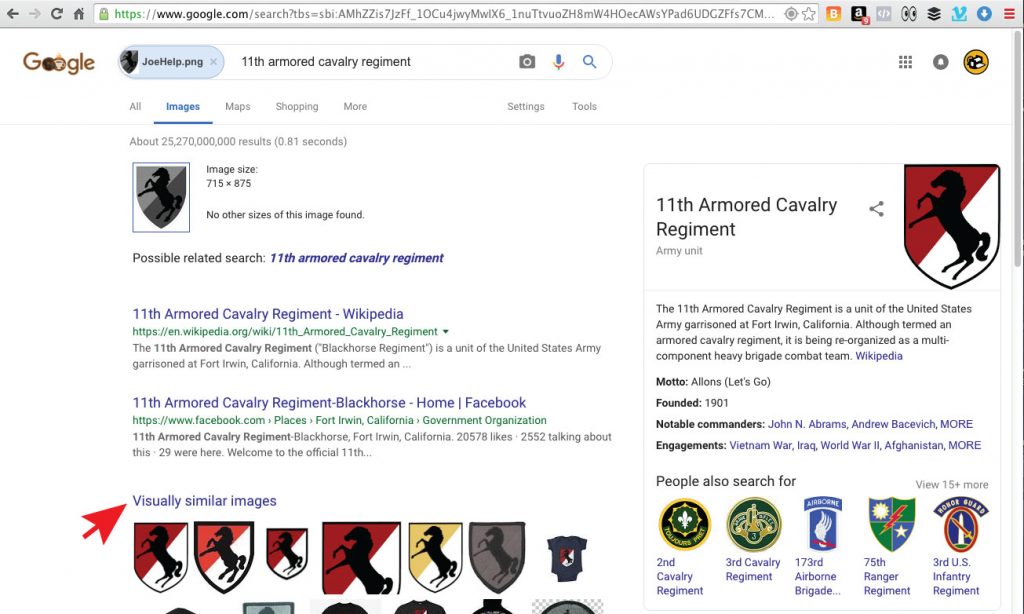
4. Google identified and located similar images. Click on “Visually Similar images”.
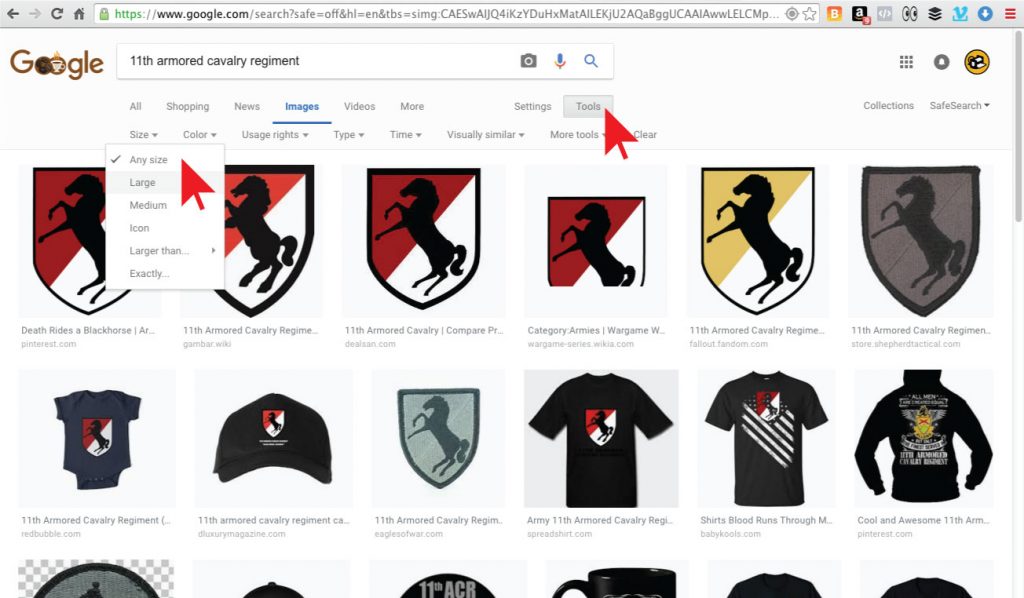
5. Narrow the displayed images by clicking on the “Tools” and selecting “Size” “Large”
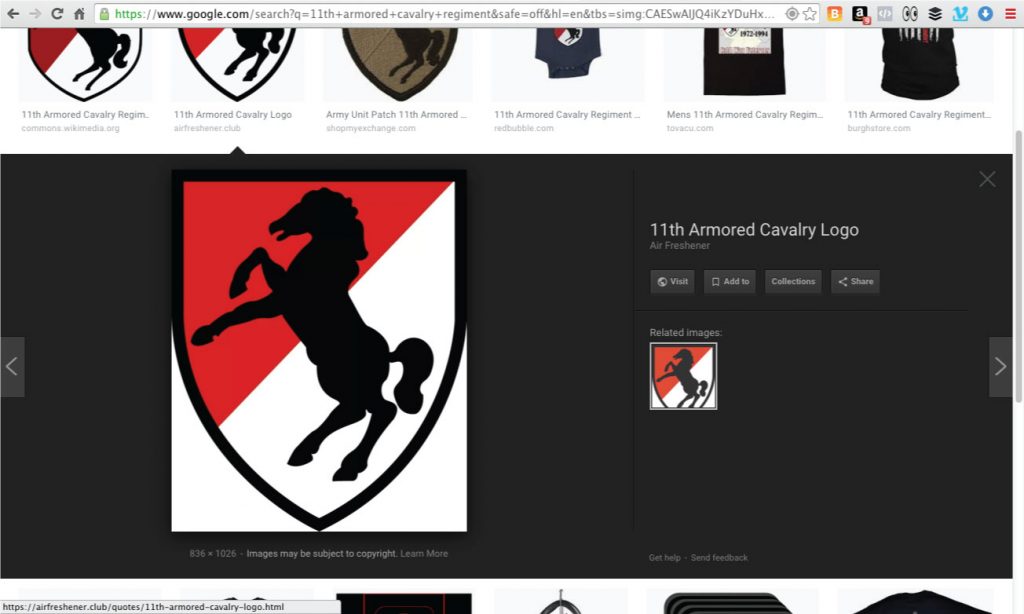
6. This yielded us a good find. This image looks clean and is over 1000px tall.
Just drag the image off onto your desktop or right-click and save image.

6. Now, import this image to quickly make into a carve ready pattern.
REMEMBER: We mentioned something about transparent backgrounds earlier. Finding a good image is just the first step. Importing it and removing the background is the next step. Learn all about doing that in our importing graphics tutorial video.
Tutorial 4.1 – Import Image Part 1 – Graphics (Old Designer)