
Artificial intelligence has evolved rapidly in recent years—and it’s now a powerful tool for makers, designers, and CNC enthusiasts. Whether you’re creating custom carvings, signs, or decorative pieces, AI can dramatically speed up your workflow and unlock new creative possibilities.
In this guide, you’ll learn how to use AI for CNC projects, from generating images to converting them into 3D relief models ready for carving.
Why Use AI in CNC Design?
AI tools simplify some of the most time-consuming parts of CNC design. Instead of manually creating artwork or 3D models from scratch, you can:
- Generate custom artwork instantly
- Convert images into 3D reliefs
- Speed up prototyping and iteration
- Explore creative ideas you may not have considered
As a result, both beginners and experienced users can produce high-quality CNC projects faster than ever.
Step 1: Generate an Image with AI
To begin, you’ll need an image to convert into a 3D model. Tools like Google Gemini make this process simple.
Step 1: Generate an Image with AI
To begin, you’ll need an image to convert into a 3D model. Tools like Google Gemini make this process simple.
Tips for Better AI Image Prompts
Although generating images is easy, creating usable images for CNC carving requires some strategy:
- Avoid blurry or low-detail images
- Avoid overly complex textures
- Ensure strong contrast between elements
- Keep compositions clean and defined
For best results, try adding phrases like:
- “relief style”
- “high contrast”
- “engraving design”
- “black and white drawing”
These help produce images that translate better into carvable depth.
You can also upload an existing image and ask AI to:
- Clean it up
- Simplify details
- Convert it into a relief-style design
This is especially useful for logos, photos, or custom artwork.
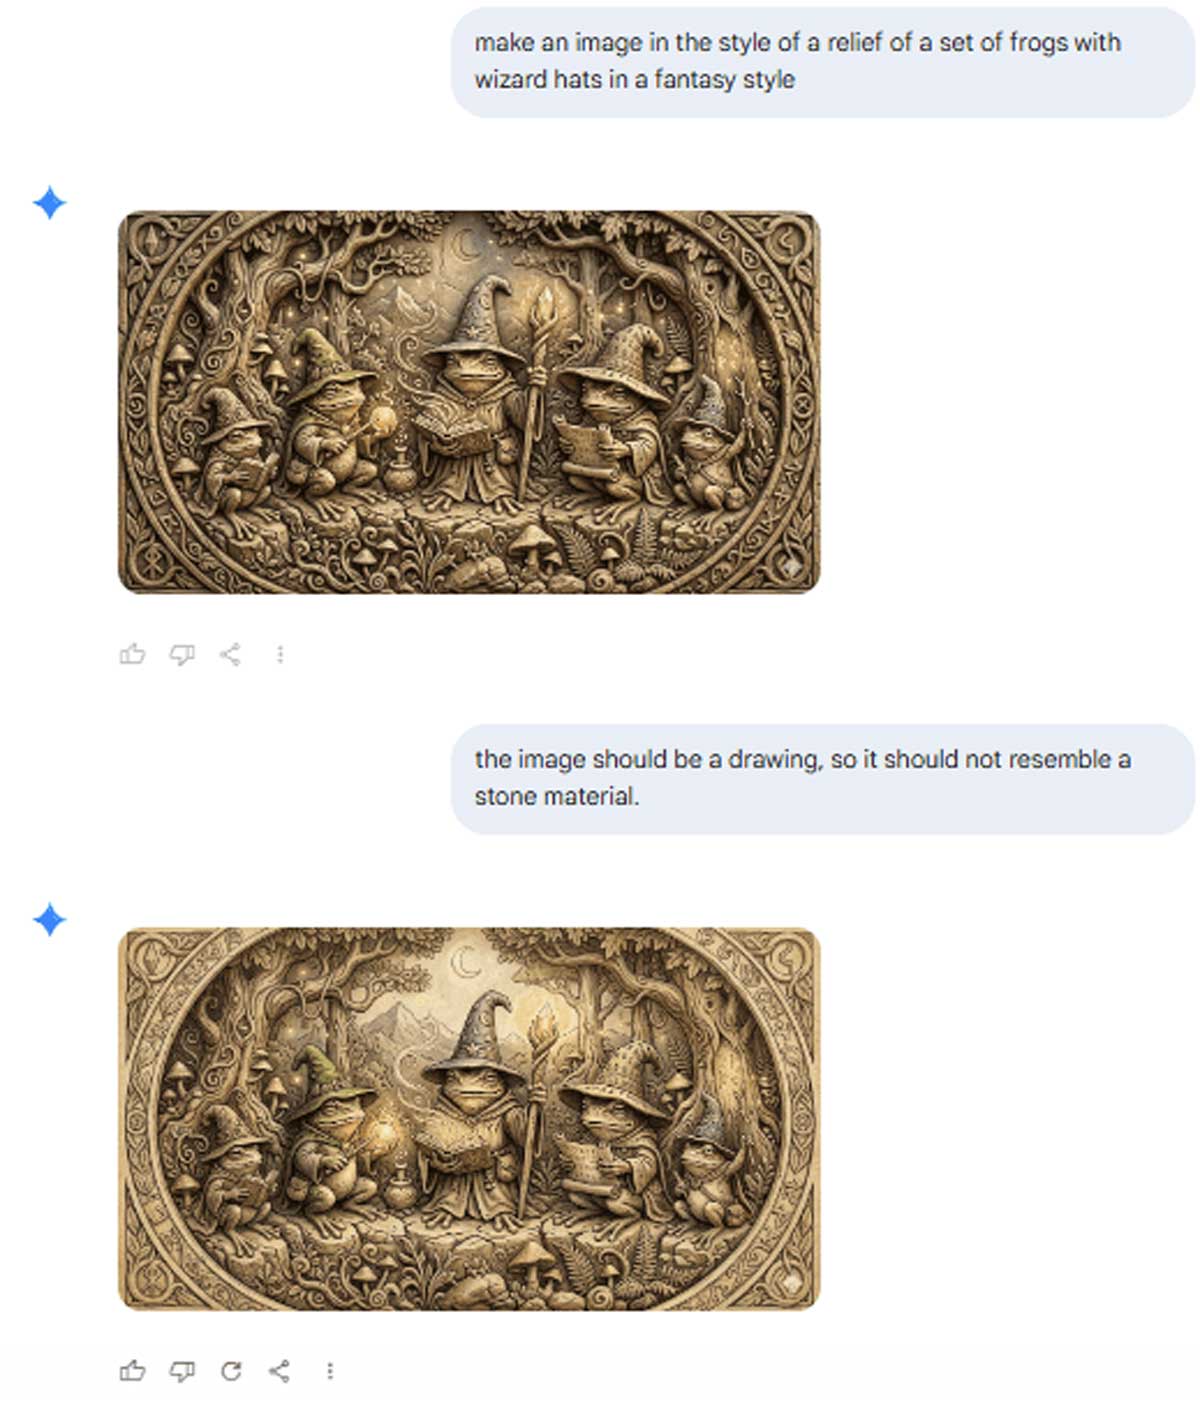
For this article, I have prompted Gemini to make an image of wizard frogs. Below is the prompt exchange I used:
Step 2: Convert Your Image to a 3D Relief
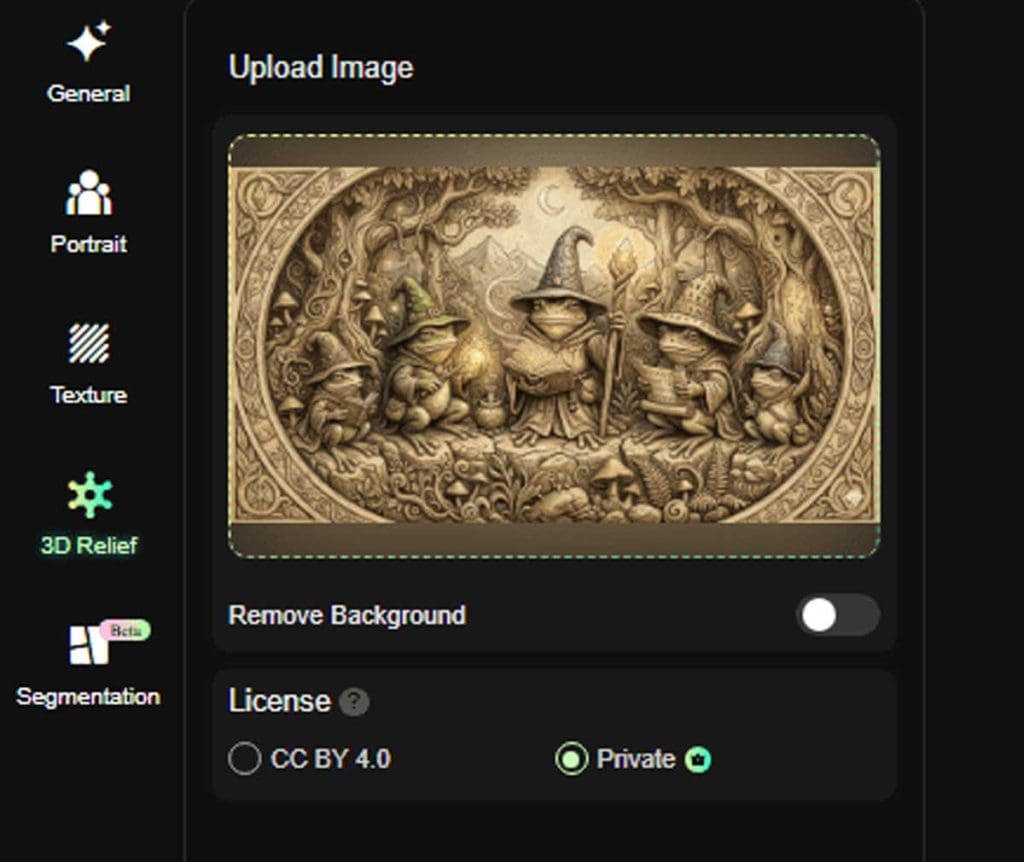
Once your image is ready, the next step is turning it into a 3D model. Tools like Hitem3D specialize in AI 3D relief generation.
Why Use Hitem3D?
Hitem3D is one of the more popular tools for converting images into STL files. It offers:
- AI-generated 3D relief models
- Simple upload and processing workflow
- Adjustable depth and geometry settings
The platform includes a free trial with limited credits, allowing you to test multiple designs before committing.
Alternative AI Tools
Other tools you can explore include:
These typically generate depth maps, which can then be imported into CNC software and refined.
Step 3: Generate and Refine Your Model
Inside Hitem3D, you’ll find several generation modes, including:
- General (full 3D models)
- Portrait (3D busts)
- Texture
- 3D Relief (recommended for CNC projects)
- Segmentation
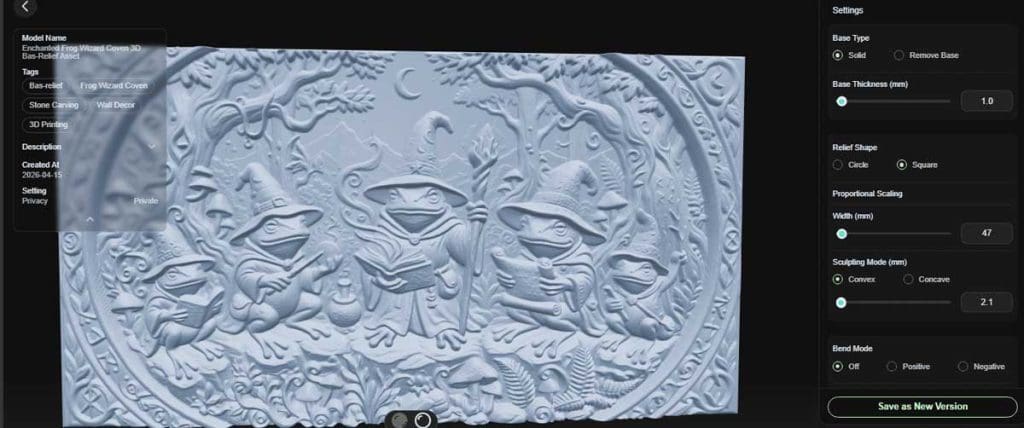
For most CNC carving applications, the 3D Relief option works best.
Key Settings to Adjust
After uploading your image:
- Background Removal: Decide whether to isolate the subject
- Base Type: Adjust or flatten the back of the model
- Shape: Choose square, rectangle, circle, or oval
- Scaling: Resize your model
- Height/Depth Slider: Increase depth for stronger carving contrast
Be careful with depth—too much height can cause carving issues or loss of detail.
Once satisfied, export your model as an STL file.
Step 4: Import Your STL into CNC Software
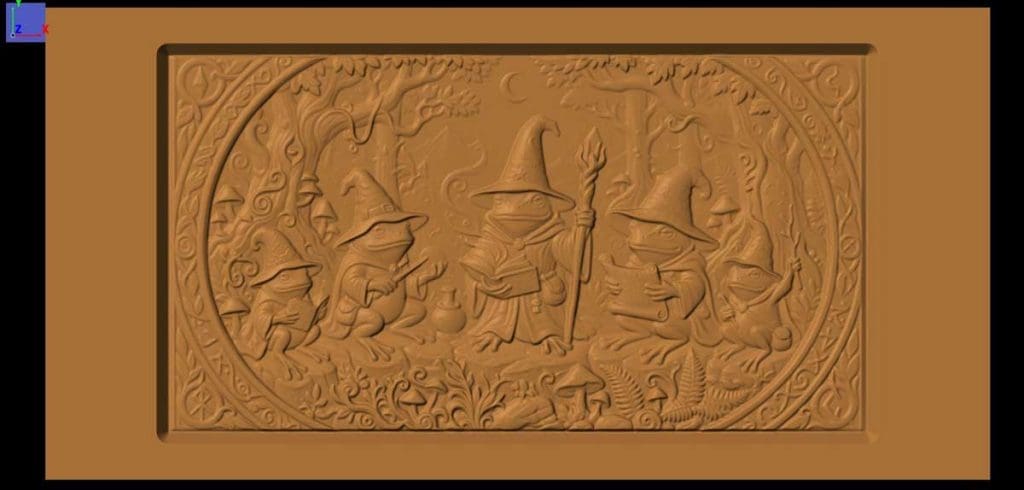
Next, bring your model into Designer 5.
Import Process
- Navigate to the Import tab
- Select Import STL
- Adjust the pattern size (commonly around 8 inches wide)
- Place the model on your board
At this stage, your design may already be carve-ready. However, additional refinement can significantly improve results.
Step 5: Clean Up Your Model with Sculpting Tools
For best results, refine your model using Sculptor 2.
Common Adjustments
- Smooth unwanted artifacts
- Reduce harsh edges
- Fix surface inconsistencies
- Clean up background noise
AI-generated models can sometimes introduce imperfections—especially from lighting or reflections in the original image. Fortunately, tools like smoothing and lowering can quickly fix these issues.