The head of the CarveWright ABC model machines can be moved up or down to accommodate different material thicknesses. It is guided vertically by four guide posts located at the corners of the machine and driven by a lead-screw on either side of the machine located between the posts. The lead-screw adjacent to the keypad is driven by the crank and it is tied rotationally to the opposite lead-screw by the long tie-rod located in the base of the Machine.
It is critical that the head is level at all times or it will bind and become difficult to move up and down. While extremely rare, the head can become unlevel for several reasons. The cause behind the loss of head level needs to be understood before the machine repair is completed. Common causes for loss of head level are: a loose lead-screw nut, a stripped gear between the end of the tie-rod and lead-screw, or a broken base that allows the tie-rod to become disengaged from one of the lead-screws.
To level the head you will need the following tools:
- #2 Phillips screwdriver bit and drill
- 10mm Socket and ratcheting wrench
- Large Crescent wrench (2X)
- Ready the machine. Unplug the machine from the power outlet and place it on a stable work platform. Raise the head up several inches and move the Y-truck to the center of the machine for best access. Remove the dust collection bag from the back of the machine.
- Adjust the head height. Crank the head up toward the top of the machine. Crank it up until the top surface of the head casting is aligned with the flats on the vertical guide rods on the right side of the machine (opposite the keypad). In the Figure 1 below we have removed the right side panel so you can clearly see the notches on the top of the guide rods. You will need to align the notch flats to the top surface of the head casting.

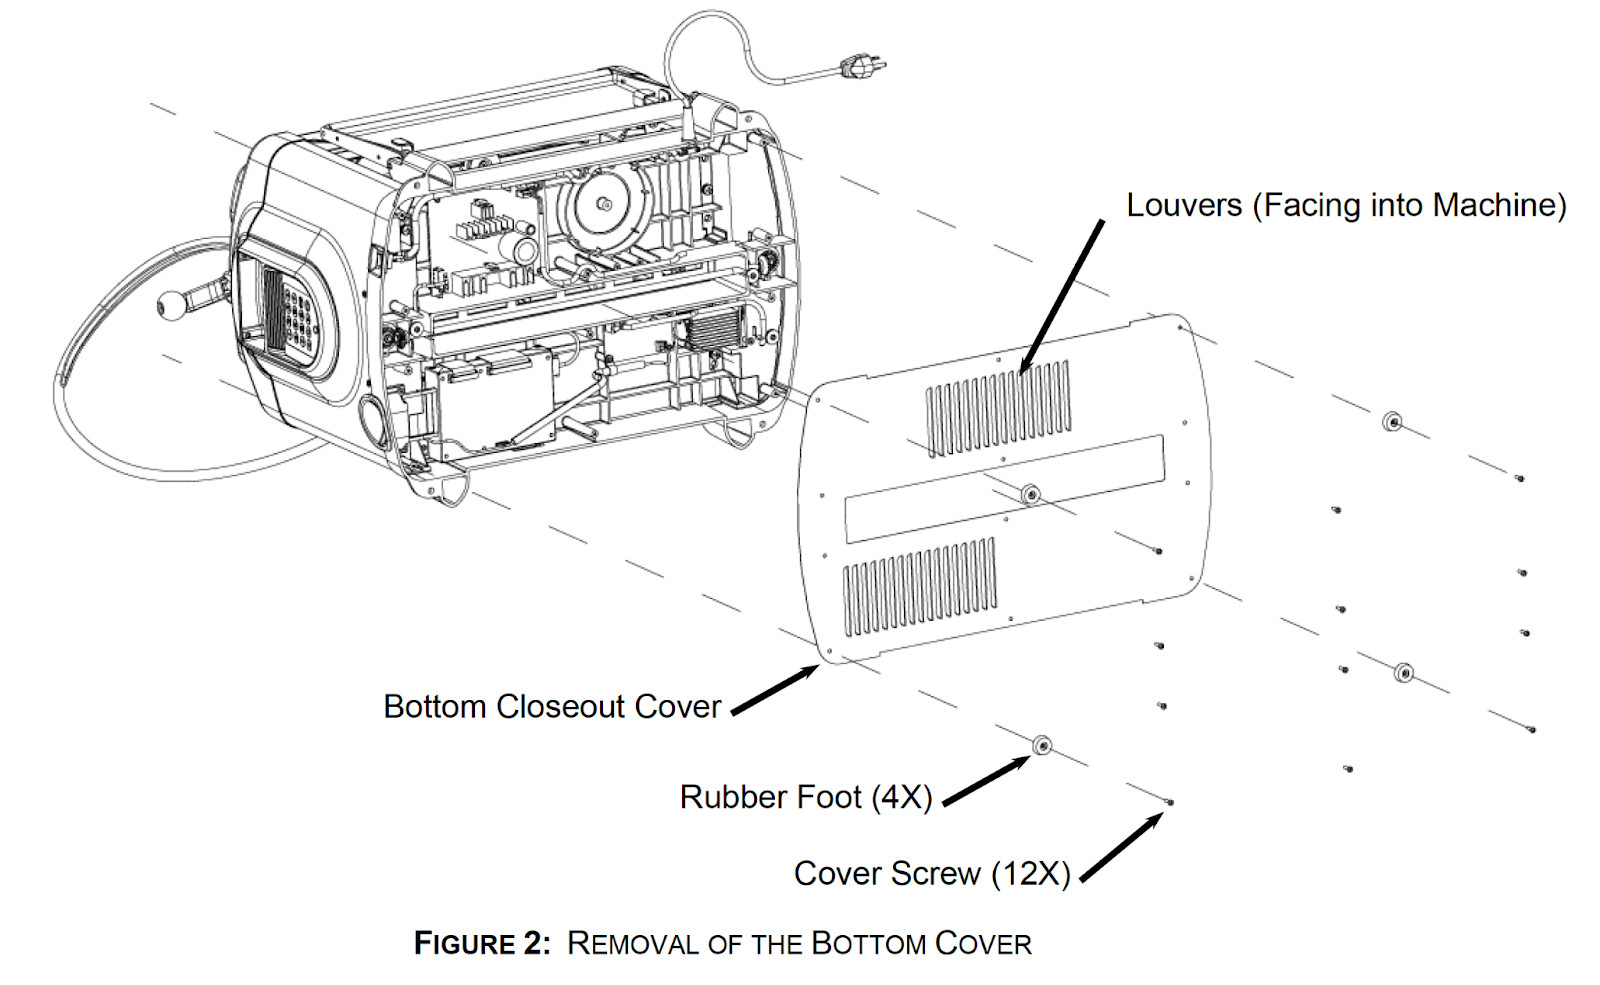
- Remove the bottom cover. Carefully lay the machine on its back. Remove the 12 screws securing the black sheet metal cover onto the base (four are located in the rubber feet) and remove the cover.
- Remove the lead-screw tie-rod. While the machine is still on its back, locate the lead-screw tie-rod. This tie-rod (with bevel gears) connects the two lead-screws on either side of the machine. The lead-screws drive the head up and down as the crank handle is turned. Remove the two screws with washers that secure the tie-rod into the base. Remove the lead-screw noting any spacer washers that may be needed.

- Look for damage to the machine base that would cause the loss of head level.Inspect the bevel gears on the removed tie-rod for broken teeth along with the mating lead-screw bevel gears still attached in the machine. Make sure that the plastic around the tie-rod screws and around the area below the lead-screw bevel gears in the base is intact. Report any finding to the CarveWright service technician.
- Adjust the head height. Return the machine to the upright position. Be careful to not pinch any wires that can drop out of the base as you return the machine to upright. Carefully turn the crank until the top surface of the head casting is level with the notch flats on the keypad side. If the head level was significantly off to start you may have to reassemble the tie-rod and then repeat steps 2-6 until the top surface of the head casting is aligned with the notch flats on all four vertical guide rods.

If it is determined that the issue is a loose lead-screw nut you will have to first tighten the nut and then follow Steps 1-6. Step 7 shows how to tighten the right side lead-screw nut. Tightening the left side is essentially the same except that you need to watch the cables that are attached to the side panel.
- Remove the right side panel assembly. Remove all four side panel fasteners. Using the 10mm socket remove the two hex head bolts (and washers) from the top of the assembly. Remove the two Phillips head screws from the base of the side panel with the screwdriver. Lift off the side panel. Remove the two washers that are located on top of the vertical guide rods.

- Tighten the large jam nut on the bottom of the lead-screw nut. Using the two crescent wrenches tighten the large jam nut while keeping the lead-screw nut from turning. Proceed to Step 2 to level the head as needed.

Reassembling the Machine
- Replace the right side panel assembly (if required). Place the side panel assembly back onto the machine making sure that the bottom of the panel sits into the grooves and tabs located on the base casting. Make sure to replace the two washers that that reside on the very top of the vertical guide rods before you replace the side panel. Insert the two bottom screws and tighten with a #2 Phillips screwdriver. Insert the top hex head bolts (with washers) and tighten with the 10mm socket.
- Replace the lead-screw tie-rod. Carefully lay the machine on its back with the dust collection port facing down. Replace the lead-screw tie-rod with any spacers and hand-tighten the two screws. Do not over-tighten the screws as the plastic base can crack.
- Replace the bottom cover. Replace the metal cover with the louvers pointing into the machine (see Figure 2). Insert and tighten the 12 screws. The four rubber feet are placed at the corners of the machine.